This time the i will show all users of Mac OSX Leopard/Snow Leopard how to setup apple Time Machine Most Mac users are already familiar with the icon (Time Machine) but not many know how to setup, yet alone use it. For full setup tutorials, don't be shy-silu to continue reading:)
WHAT IS APPLE TIME MACHINE ?
Time machine is an application that is innate in every Mac OSX 10.5 Leopard/10.6 Snow Leopard. It serves as the backup where it will make a copy of all the objects that exist in your Mac every hour! If you terdelete something fail, you still can restore him back with great pleasure. For example, you have to delete your work assignment because it no longer needs it, but if the words a few days later you need it again, Time Machine ready look for the file in storage. Simple!
WHAT DOES IT TAKE TO SETUP A TIME MACHINE?
- Mac Computer
- Mac OSX 10.5 Leopard/10.6 Snow Leopard
- External Hard Drives/Apple Time Capsule
Note: you may choose to use external hard drives external jenama compatible with Mac or using Apple's Time Capsule, no problem.
What Is Apple Time Capsule
Time Capsule is an Apple external hard drive that uses a wireless or LAN in order to connect. Time Capsule also acts as a Wireless Base Station in your home. A Time Capsule to be used for a Mac that is inside the network. Capacity 1TB Time Capsule 2TB and is comprised of. The price for the Time Capsule is RM 1, 099.00 (1TB) and RM 1, 799.00 (2TB). Expensive right? But you need to remember that the Time Capsule is a combination between external hard drives as well as wireless base stations, 2 in 1.
Apple Time Capsule preview you can see on screenshot below

1 x Time Capsule for some Mac in his network:-

Time Capsule as a Wireless Base Station (Dual Band Wireless 802 .11b/g at 2.4 GHz & 5 GHz 802 .11n at):

Note: if it is not capable to have a Mac Time Capsule, without fear, because you can also still use the external hard drive other jenama much cheaper and larger capacity. Need to be reminded, it is must be compatible with Macs.
LET'S BEGIN! PLUG IN YOUR HARD DRIVE
Here I am using the external hard drive. I believe the average reader is not able to have Time Capsule, including me T_T God willing, one day soon ...
2. Open time machine apps
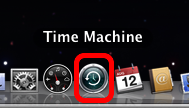
Icon Time Machine should be above your Dock.
3. SETUP YOUR TIME MACHINE STORAGE LOCATION

Time Machine needs to know which drive you will be using for the backup later. Click "Set Up Time Machine".
4. Select YOUR BACKUP DISK

Now, you need to select the drive that you're going to use it for Time Machine. Click on "Choose Backup Disk ..."
5. Select YOUR HARD DRIVE

If you have more than one hard drive, you will see all of them here.
(1) select the drives that you will use for Time Machine.
(2) after the content, click on the "Use for Backup."
6. TIME MACHINE SETTINGS

Time Machine has been willing to backup
(1) the Time Machine On/Off. Now the sliders Time Machine was ON.
(2) the count Kaunter for backups etc. If the time empty at up to (0), Time Machine will begin to copy fail-fail in your Mac to an external hard drive.
Note: You can slide to OFF before Time Machine backups began while kaunter calculation has not been empty at up to (0). If you allow him mececah is empty (0), Time Machine will begin to backup – so as not to dinasihatkan using your Mac at present.
7. BACKUP STARTS

After the kaunter calculation "Next Backup" mececah blank (0), the backup file will be started automatically.
(1) Backup progress bar will appear in the pop up window.
(2) the Backup progress will also appear in Time Machine preferences.
Note: the progress it will take a rather long time. As seen in the picture above, there are 38.5 GB of data to transfer it to a new external hard drive. This will take several hours to complete. If you have more data to transfer, you will take a longer time. Also, you'll feel your Mac will slow a bit for a while along the backup progress. So, what you need to do? Go watch that movie or TV ... or take a breath of fresh air while waiting for your Mac. You can turn off the backup by clicking on the icon "X" above the numbers (3) in the above gamba.
8. TIME MACHINE – the GREEN COLOR
You may have noticed your hard drive icon changes color to green (sweet!: D) and there is a Time Machine logo on it (double sweet! ^ ^)
9. (OPTIONAL) TIME MACHINE SETTINGS

(1) the (optional) click on the check box next to "Click the lock to prevent further changes" to ensure there is no anyone who can edit the Time Machine Preferences. After it is in-locked, you need a password to open it to make any changes to be blessed. Make sure you remember his password before being locked!
(2) (optional) click on the check box next to "Show Time Machine status in the menu bar". Try to guess what will happen? Of course he will show the status of the Time Machine and on the menu bar.
(3) click on the (?) for Help.
10. TIME MACHINE is READY TO ROCK!!
After the backups Time Machine finished for the first time, you're allowed to sit relax because all your data has been successfully saved! :) To see the data that has been backed up, click on the icon (Time Machine) in your Dock. And to change the setting of the Time Machine, click on the icon (System Preferences) – also on your Dock.
Time Machine Apps :-Search/Scroll to hour or date to access fail-fail you. Remember, Time Machine will copy all your data every hour.
Read Also : Tutorial Jailbreak iOS 6.1 Beta 2 With Redsn0w stay update with as mac apple news udpate
So his friends as well as all readers, that is the way to setup your Time Machine. Hope this tutorial can help you all, and if there are any errors or problems, please do not ask to overheads much, you can be in the room with the comment below. For more info can be found at: http://support.apple.com/kb/HT1427
update: I found a great video about the Time Machine)

Title Post: How To Setup Mac Time Machine - Backup
Rating: 100% based on 59998 ratings. 5 user reviews.
author : Unknown
Thanks for visiting tutorial for android blog, If any criticism and suggestions please leave a comment
Rating: 100% based on 59998 ratings. 5 user reviews.
author : Unknown
Thanks for visiting tutorial for android blog, If any criticism and suggestions please leave a comment
Subscribe to:
Post Comments (Atom)
0 comments:
Post a Comment